Online ID Validation
Сheckpoint Online ID Validation is a tool that allows Leasing Agents to validate the identification of the non-resident with the help of a photo and his/her identification. The non-resident does not have to be present, a link is sent to the non-resident’s smartphone with a link to complete the validation process. This documentation describes the steps to implement Сheckpoint Online ID Validation into your product.
The validation steps are as follows:
- Recognizes and analyzes the 2D barcode of the non-resident’s identification card;
- Utilizes the webcam on a PC or camera on a smartphone to read the document details on the front of an ID;
- Compares the face on the document to the face captured by the webcam or smartphone camera;
- Compares the information in the 2D barcode with the information retrieved from the front of the ID;
- Analyzes state-specific features of the ID; and
- Checks with third-party databases to help determine the validity of the document.
In the documentation, we describe the process of embedding the page of the automatic capture of the document and the face to your site. In addition, we introduce the API which is necessary to work with this page.
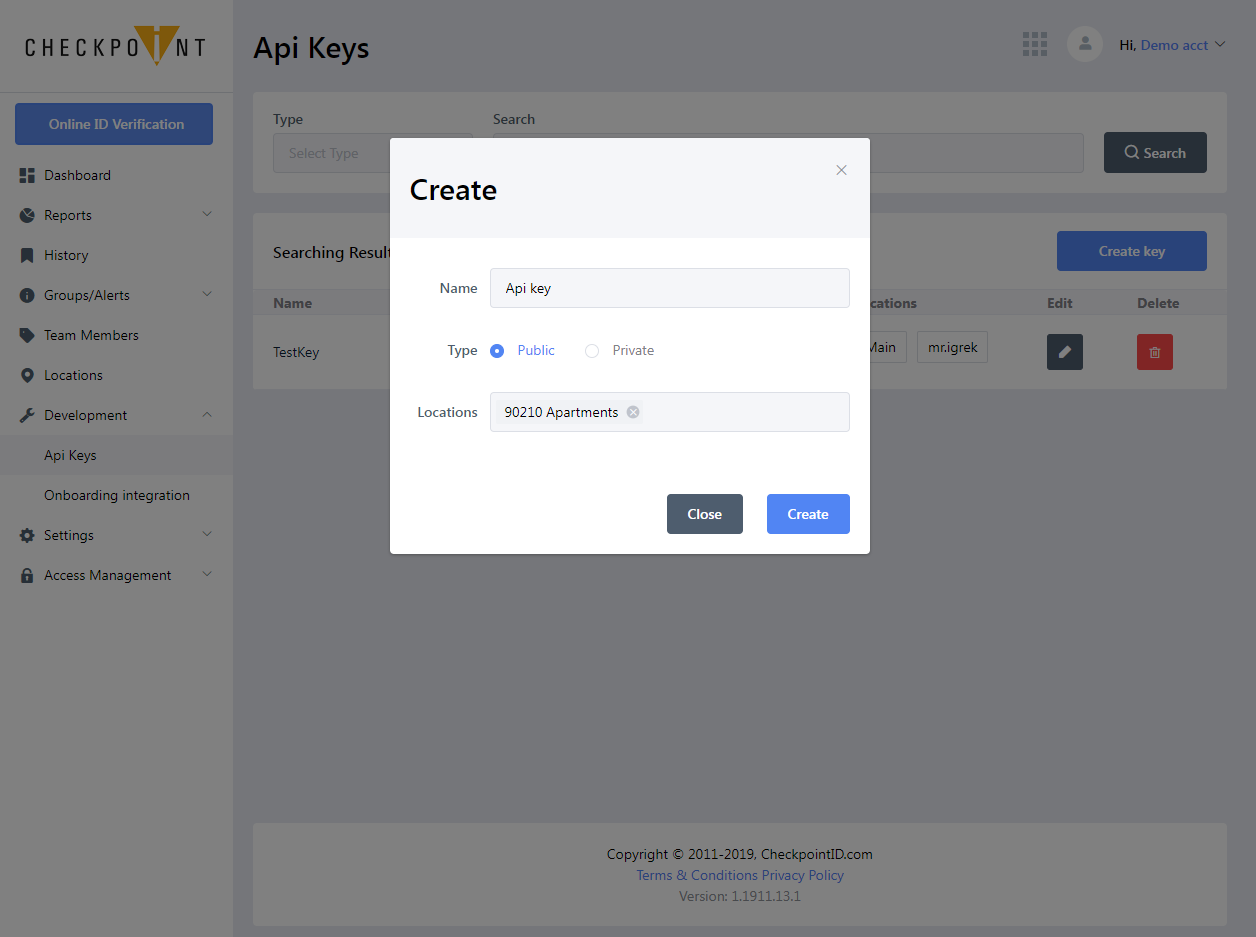
1. Creation of API Key
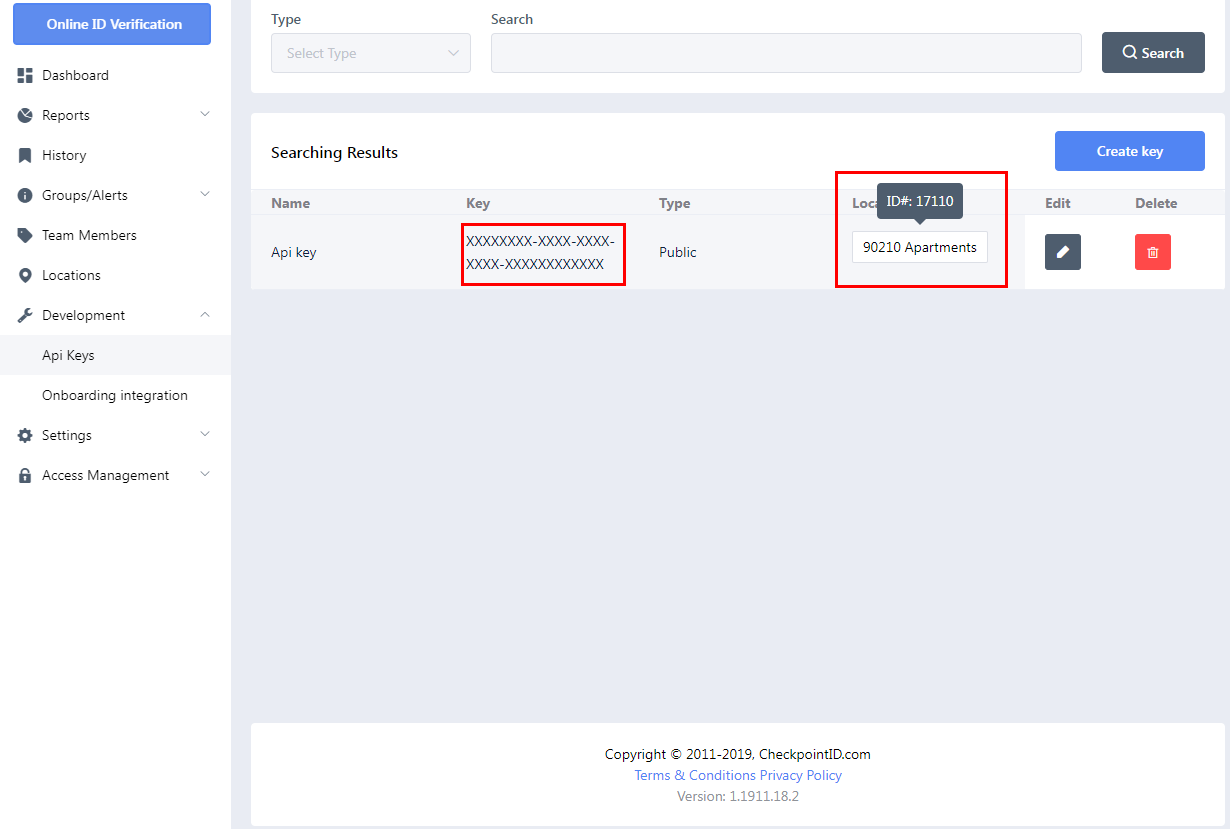
Log in https://my.checkpointid.com and browse to Development/API keys.
Create a new key and bind to the location. Key type - public
2. Generation of POST Request to REST API
Create a request using the generated API key and the unique location identificator locationId. (see the screenshot above).
Send the data of a non-resident in the body of the request. (see snippet below Request Body)
Request:
POST https:/my.checkpointid.com/api/Onboarding/Embed HTTP/1.1
Host: my.checkpointid.com
Accept: application/json
Authorization: UserCode XXXXXXXX-XXXX-XXXX-XXXX-XXXXXXXXXXXX
Content-Type: application/json
Content-Length: 106
Request body:
{"locationId":17110,"phone":"+1111111111","sendSms":true,"firstName":"Name","lastName": "LastName","email": null}
Response:
HTTP/1.1 200 OK
Content-Type: application/json; charset=utf-8
Server: Kestrel
Strict-Transport-Security: max-age=2592000
X-Powered-By: ASP.NET
Date: Tue, 08 Oct 2019 10:06:23 GMT
Content-Length: 101
{"userKey":"YYYYY-YYYYY-YYYYY-YYYYYYYYYY"}
The non-resident must send the documents and a photo of his/her face on the validation page (https://my.checkpointid.com/IDValidation/YYYYY-YYYYY-YYYYY-YYYYYYYYYY/) or on your website. In order to use the scenario with the validation page you should send an SMS message with this link to a person.
For this purpose set the field sendSms into the data value true in the request body.
In order to use the scenario with your site you should use iframe which is described in the following step.
3. Addition of Validation Page into Iframe for Website
Insert the following code onto your page.
Use userKey which you received earlier.
Attention! The page with the invalid key will response to http with the code 404.
In order to get the validation result from iframe it is necessary to subscribe to events. Possible results are demonstrated in the code comments.
Example of use:
<iframe id="iframe" allow="camera"  src="" frameborder="0" width="100%" height="480px"></iframe>
    <script>
        var iframe = document.getElementById('iframe')
        var urlParams = new URLSearchParams(window.location.search)

        const GUID = ‘YYYYY-YYYYY-YYYYY-YYYYYYYYYY’
        const CHECKPOINT_ORIGIN = 'https://my.checkpointid.com'
        iframe.height = window.innerHeight

        // link creation for iframe. "origin" required parameter for cross policy
        // Example: https://my.checkpointid.com/IDValidation/733c5e77-b2b7-4112-9bfd-f9c0da7a603c?origin=https://my.checkpointid.com
        iframe.src = CHECKPOINT_ORIGIN + '/IDValidation/' + GUID + '?origin=' + window.origin

        // event listener for accept messages of iframe
        window.addEventListener('message', function (event) {
            // filter by origin
            if (event.origin !== CHECKPOINT_ORIGIN) return
            var eventData = JSON.parse(event.data)
            /**
             * evenData - object
             * {
             *     type: 'system'
             *     message: 'loaded' | 'error'
             * }
             * loaded - if page was loaded
             * error - something was wrong
             * *
             * {
             *     type: 'validation'
             *     status: true | false
             * }
             * status - status of validation
             */
            console.log(eventData)
            if (eventData.type === 'validation') {
                alert((eventData.status) ? 'Success' : 'Failed')
            }
        }, false)
</script>
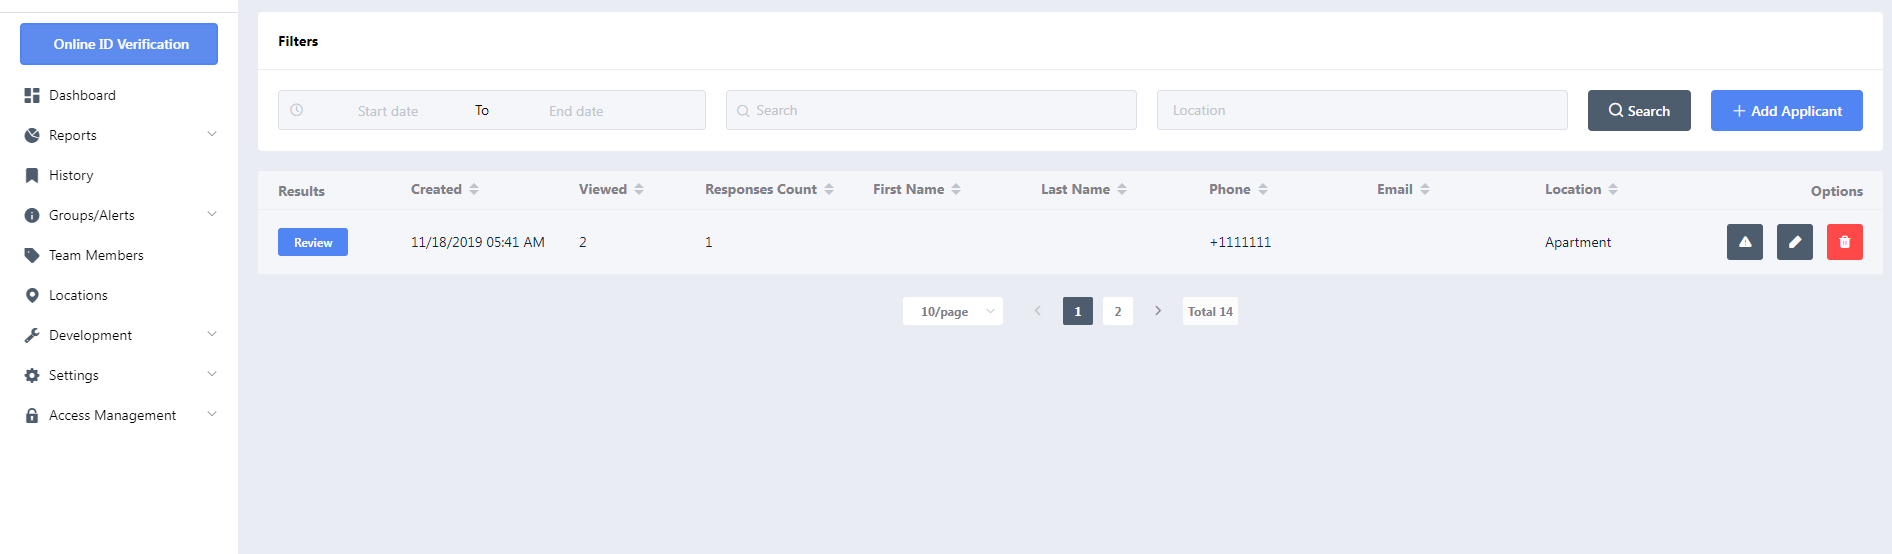
4. Viewing the History of Results
You can view all the results at https://my.checkpointid.com/validationRequest